How to Change Your MOTD

How to Change Your MOTD
The message of the day (MOTD) is the text players see beside your server in the multiplayer server list. This guide covers the built-in server.properties setting, ServerListPlus, and MiniMOTD. Choose the option that matches your server software and the features you need.
How to change your MOTD without a plugin
- Write your MOTD using the Minecraft MOTD creator, then copy the generated
server.propertiesvalue. - In your server panel, open File Manager and then open
server.properties. See the File Manager guide if you need help finding the file.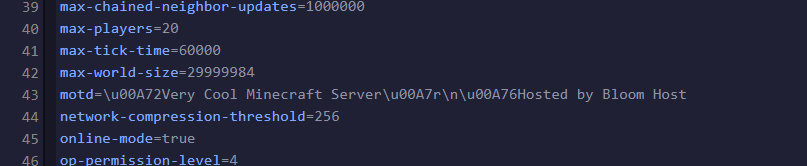
- Replace the existing
motdvalue with the copied text and restart the server to apply the change.
How to change your MOTD with ServerListPlus
ServerListPlus is no longer in active development. For current configuration details and supported options, refer to the ServerListPlus wiki.
ServerListPlus can customize the MOTD and add separate messages for different players. Download it from the ServerListPlus project page, then:
- Upload the plugin to your server's
pluginsfolder and restart the server. - Open the generated ServerListPlus
config.ymlfile. - Follow the ServerListPlus wiki to configure the MOTD format and any player-specific messages.
- Restart the server after saving the configuration.
How to change your MOTD with MiniMOTD
MiniMOTD is a plugin for Spigot, Paper, BungeeCord, and Velocity, or a mod for Fabric and Sponge. It uses the MiniMessage system and supports RGB colors on Minecraft 1.16 and newer. Download it from the MiniMOTD project page, then:
- Upload the plugin to your server's
pluginsfolder, or the mod to itsmodsfolder, and restart the server. - Open the generated MiniMOTD
config.hoconfile. - Use the MiniMessage documentation to create your MOTD. MiniMOTD also supports multiple icons and different MOTDs per virtual host on BungeeCord and Velocity.
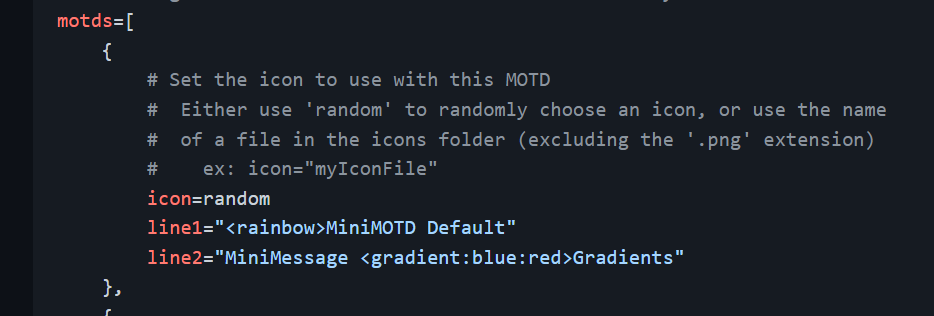
- Restart the server after saving the configuration.